Table of Contents
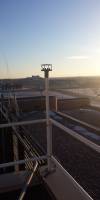
Gill WindSonic Anemometer on Clifford Hall
Links
Instrument
Software Configuration (Raspberry Pi OS)
Custom acquisition software has been written and included in the Airborne Data Processing and Acquisition (ADPAA) software package. Command,
python3 ./GillSonic_CH601.py
is used to acquire the data.
A Raspberry Pi 4 has been setup to acquire the data in CH601 with command,
lxterminal –command=“python3 /home/pi/ADPAA/src/scripts_python/GillSonic_CH601.py”
which is stored in the file,
~/bin/start_GillSonic_CH601
The Gill Sonic acquisition program start with pi user login via a line added to /etc/profile.
Software Configuration (Windows 10 OS)
The software being used for the Sonic Anemometer is WindView, which can be download from the Manufacturer Web Site. System is setup with rdesktop using standard password. Computer has Open SSH server installed and setup using “students” as username and standard password. Data is Stored in the c:\WindData directory. DeltaCopy has been downloaded and install, which enables rsync on Aircraft server to access the DeltaCopy software's Virtual Directory 'WindData' (has been added in DeltaCopy Server software) on the computer via network port 873 that needs to be open in the Windows firewall.
Data Acquisition
To start the WindView software on the computer in CH601 and begin logging data follow these steps:
- Double-click on the Gill WindView icon on the Desktop
- Select Menus →File→Connect
- A window will pop up.
- Enter CH601-YYYY in the 'Name' field box. Where YYYY is 4 digit year, like 2020.
- Select 'GILL_POLAR_TWO_AXIS' in 'Output Format' Pull down menu
- Select COM1 in the 'Port' Pull Down menu
- Select 9600 in the 'Baud Rate' Pull Down menu
- Select NONE in the 'Parity' Pull Down menu
- Click 'Connect' Button
- Should see data coming in on left side of window (with 'Data' tab selected), if not, reset power on Sonic Anemometer.
- Select Menus →Settings→Logging
- The 'Log Settings' window will pop up.
- Check 'Enable' under 'Segmented Logging'
- Select 6 mins in 'Create new log file every' field.
- Check 'Append Time Stamp' field.
- The 'Directory' field should be M:\Surface\CH601\data\WindSonic\raw (M: drive is mounted drive from aircraft.atmos.und.edu)
- The 'File Name (prefix) field should be Wind.txt
- Click 'Apply' Button
- Click 'OK' Button in pop up Window.
- Select Menus →Log→Start
For troubleshooting purposes:
- If sonic anemometer is not transmitting data:
- Check/reset serial cable attached to computer.
- Check/reset power to sonic anemometer/computer.
- Then, re-startup data acquisition process.
Data Stream
- Transfer to Aircraft Server
- Data is transferred from CH601 Windows 10 computer to Aircraft server.
- Data is stored in /nas/Surface/CH601/data/WindSonic/raw on Aircraft server.
- The script /nas/Surface/CH601/ingest/scripts/rsync_ch6012local does the transfer.
- Create Plots on Delene's Website
- The script /nas/Surface/CH601/data/WindSonic/scripts/process_all_winds creates all plots.
- Plots are stored in /nas/Surface/CH601/data/WindSonic/plots on Aircraft server.
- Transfer to Web Server
- The /nas/Surface/CH601/ingest/scripts/rsync_aircraft2adiabat copy plots to Web server.
- Upload Data to UND CHORDS Server
- Upload script /nas/Surface/CH601/ingest/scripts/Wind-6_Realtime2chords.py
- Automated (crontab)
- The Data Stream is automated using the david.delene user's crontab on Aircraft server.
- The crontab information is archived in /nas/Surface/CH601/control/contab
